Add a Resident
Residents are the people who live in or own units at your property — owners, tenants, and occupants. Adding a resident lets you track who lives where and optionally give them access to the resident portal.
- At least one unit added to your property (see Add Units)
- The resident's name and email address
Adding a Resident
Step 1: Go to the Residents page
In the sidebar, click Residents under your property name.
Step 2: Click "Add Resident"
Click the Add Resident button in the top-right corner.
A dialog will appear with the resident form.
Step 3: Fill in the resident's details
Enter the following information:
- First Name (required) — The resident's first name.
- Last Name (required) — The resident's last name.
- Email (required) — The resident's email address. This must be unique within your organization.
- Phone (optional) — The resident's phone number.
- Unit — Select which unit this resident lives in from the dropdown. The list shows all units in your property.
- Role — Select the resident's relationship to the unit:
- Owner — Owns the unit (has voting rights in HOA elections)
- Tenant — Rents the unit
- Occupant — Lives in the unit but is not on the lease (family member, roommate, etc.)
- Ownership Share (owners only) — If the role is Owner, you can enter their ownership percentage (for example, 50 for 50%). This is used for voting weight calculations.
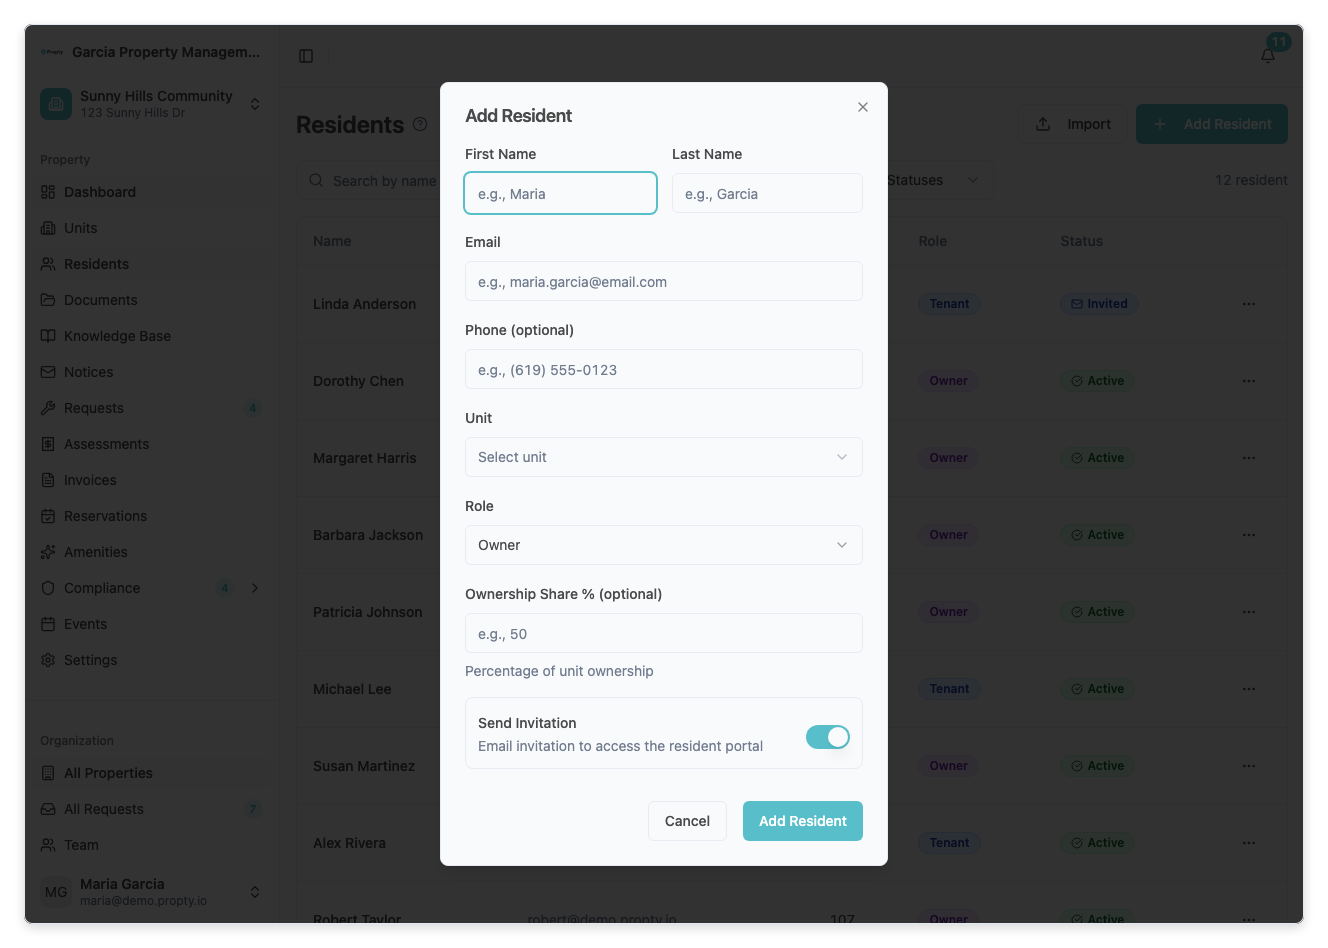
Step 4: Choose whether to send a portal invitation
At the bottom of the form, there is a toggle:
- Send portal invitation — When turned on, the resident will receive an email invitation to access the Propty resident portal. This is turned on by default.
Turn it off if you want to add the resident to your records but not give them portal access yet.
Step 5: Save the resident
Click the Add Resident button. A success message will appear, and the resident will be added to the list.
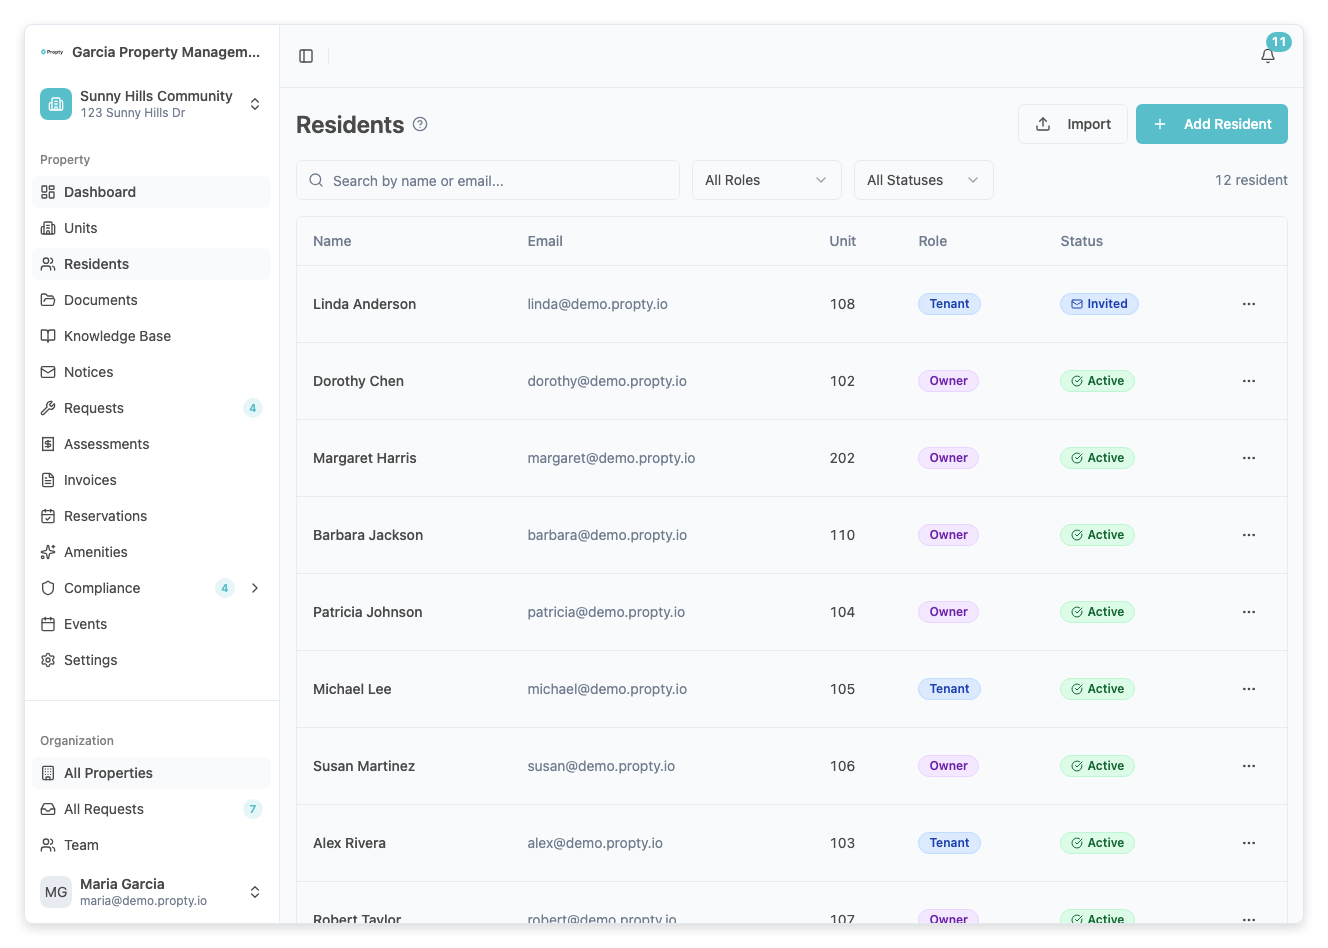
Understanding the Residents Table
The residents table shows:
| Column | Description |
|---|---|
| Name | The resident's full name |
| Their email address | |
| Unit | The unit they are assigned to |
| Role | Owner, Tenant, or Occupant |
| Status | Pending, Invited, Active, or Inactive |
Resident Statuses
| Status | Meaning |
|---|---|
| Pending | Resident has been added but not yet invited to the portal |
| Invited | An invitation email has been sent, waiting for the resident to accept |
| Active | The resident has accepted the invitation and can access the portal |
| Inactive | Portal access has been temporarily disabled |
You can search residents by name or email, and filter by status or role using the filter controls.
Importing Residents in Bulk
If you have many residents to add, use the Import feature:
- Click the Import button (next to Add Resident).
- Upload a CSV file with columns:
first_name,last_name,email,unit_number,resident_type. - Review the preview and confirm the import.
Troubleshooting
| Problem | Solution |
|---|---|
| "Email already exists" error | Each resident email must be unique within your organization. Check if this person was already added. |
| Can't find the unit in the dropdown | Make sure the unit has been created first on the Units page. |
| Resident not receiving invitation email | Check the email address is correct, then try resending from the three-dot menu. Ask the resident to check spam. |
| Need to change a resident's unit | Edit the resident using the three-dot menu and select a different unit. |