Create and Send Invoices
Create one-time invoices to charge residents for assessments, fees, or other charges. Once created, invoices appear as drafts that you can review before publishing to residents.
- A property with payments enabled (see Payment Configuration)
- At least one unit with a resident assigned
- The amount and due date for the charge
Steps
1. Go to the Invoices page
From your property dashboard, click Invoices in the left sidebar.
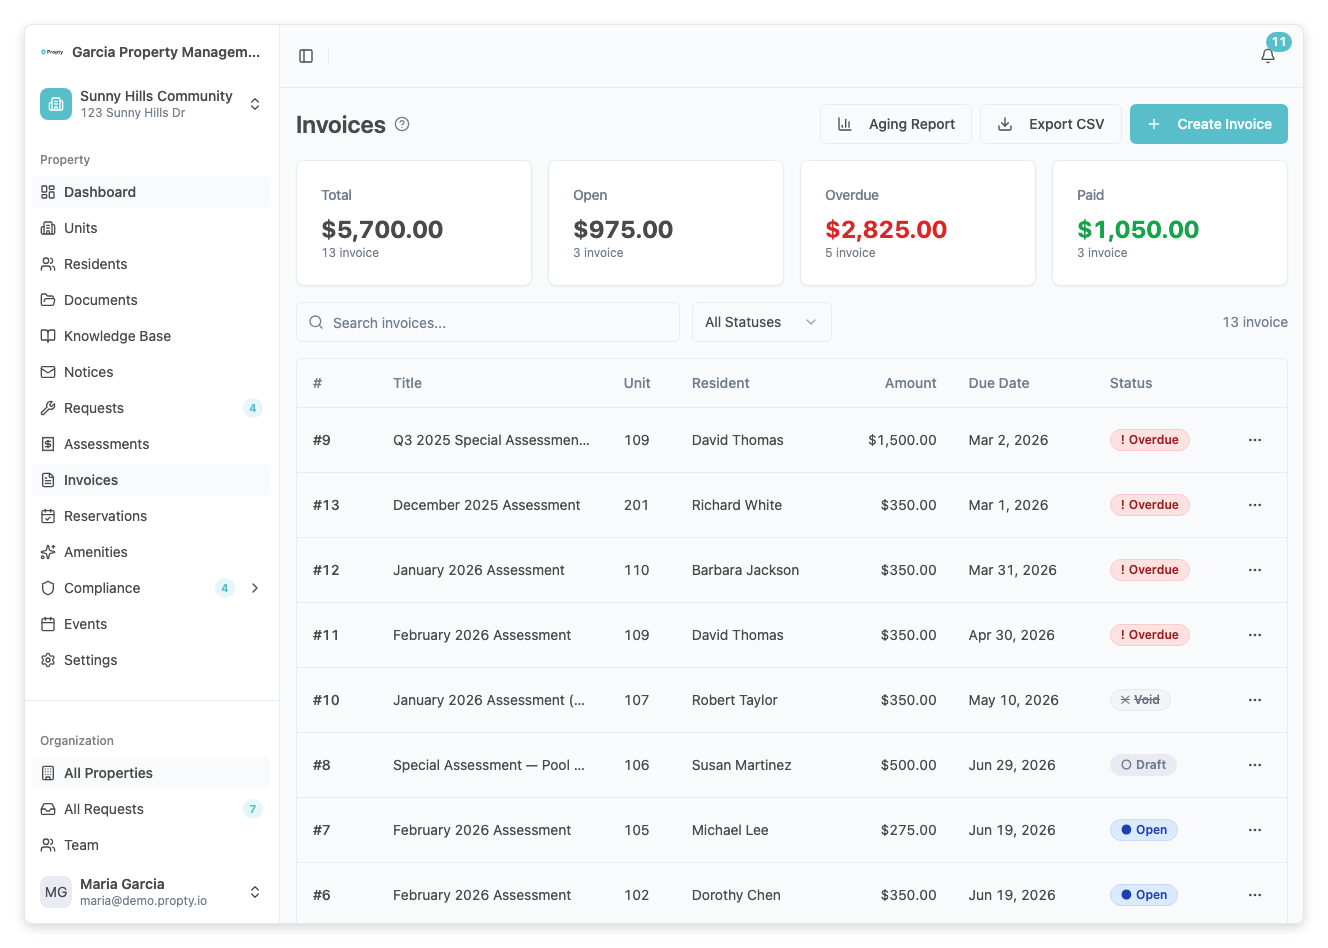
You will see the Invoices page with summary cards showing Total, Open, Overdue, and Paid amounts. If you have no invoices yet, you will see an empty state with a prompt to create your first invoice.
2. Click "Create Invoice"
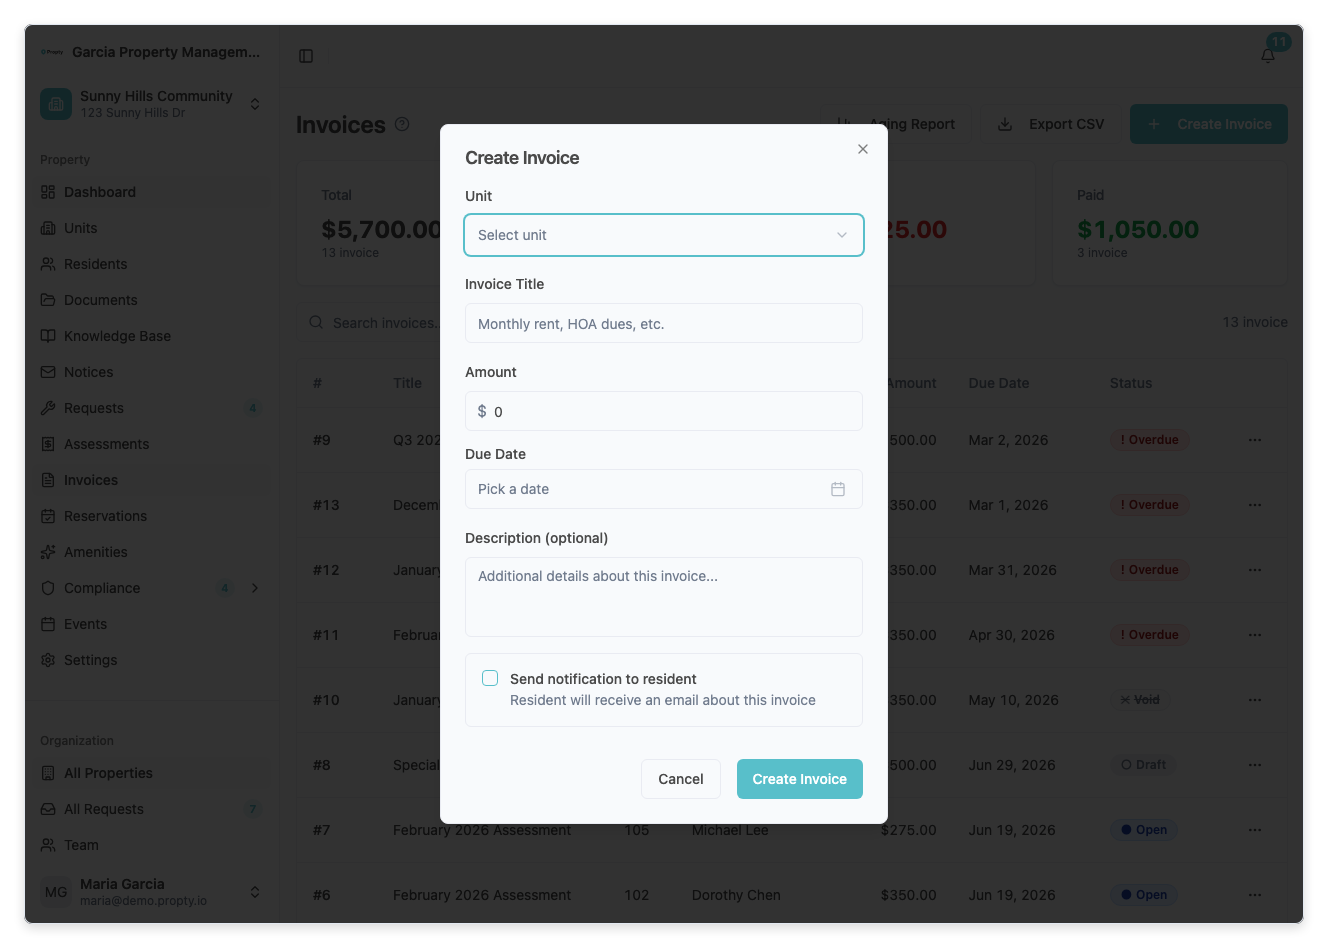
Click the Create Invoice button in the top-right corner of the page.

A dialog will appear with the invoice form.
3. Select the unit
Click the Unit dropdown and select the unit you want to invoice. Units are listed by their unit number.
If the selected unit does not have a primary resident assigned, you will see a warning message. The invoice will still be created, but email notifications cannot be sent. Assign a resident to the unit first if you need to notify them.
4. Enter the invoice title
Type a clear, descriptive title in the Title field. This is what the resident will see.
Examples:
- "Monthly HOA Dues"
- "Special Assessment - Roof Repair"
- "Parking Fee - January 2026"
5. Enter the amount
Type the dollar amount in the Amount field. The amount must be greater than $0.
6. Choose the due date
Click the Due Date field to open the calendar picker. Select a date that is today or later. Past dates are not allowed for new invoices.
7. Add a description (optional)
Use the Description field to provide additional details about the charge. This text will be visible to the resident on their invoice.
8. Choose whether to notify the resident
Check the Send email notification to resident checkbox if you want the resident to receive an email when this invoice is published. This is unchecked by default.
The email is only sent when the invoice is published, not when it is created as a draft. See Publish Invoices for details.
9. Click "Create Invoice"
Click the Create Invoice button at the bottom of the dialog. The invoice will be created with a Draft status.
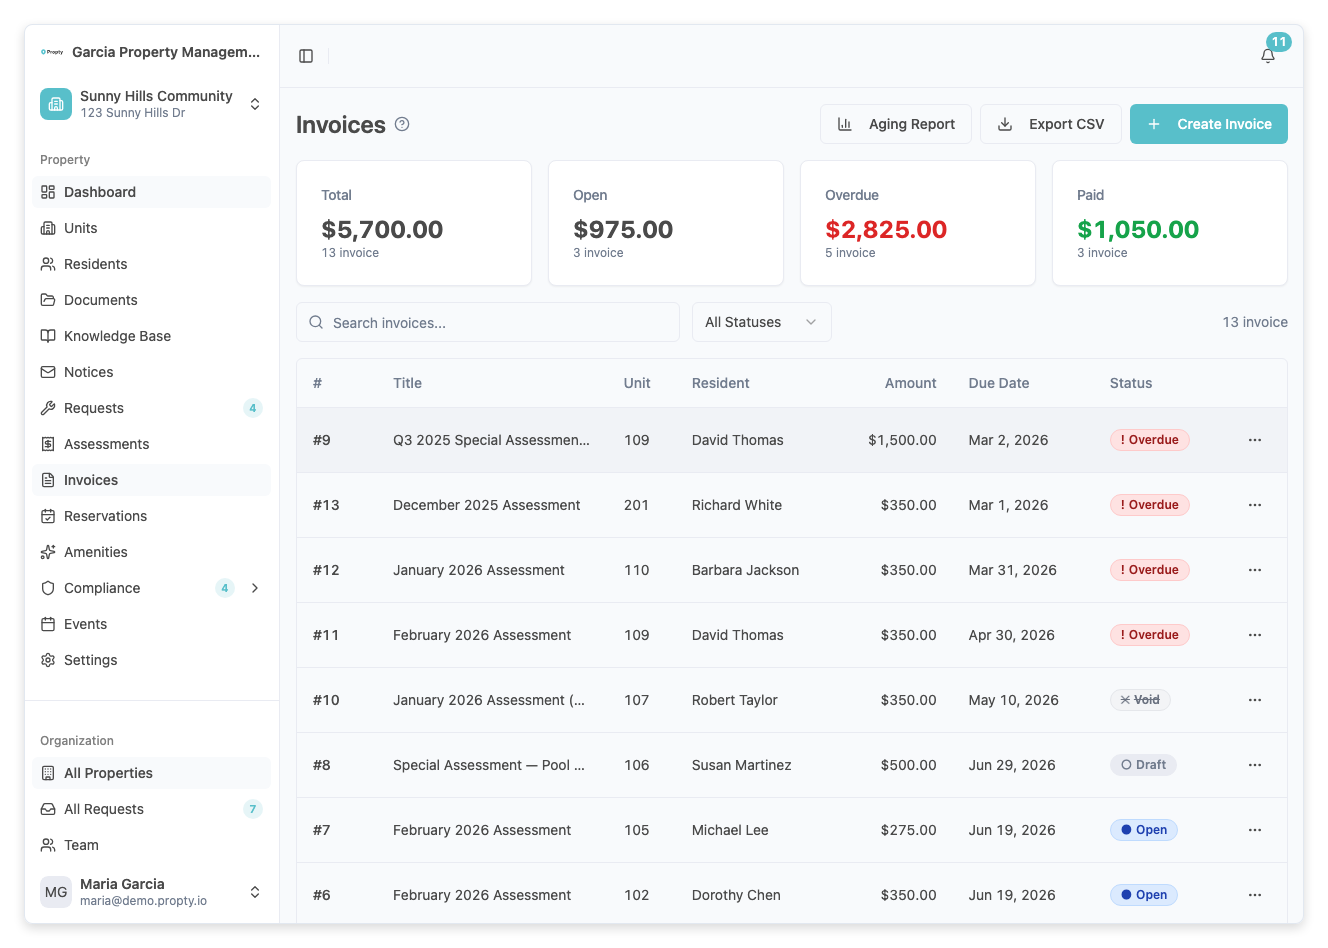
You will see a success message confirming the invoice was created.
What happens next
- The invoice appears in your invoice list with a Draft status
- Draft invoices are not visible to residents until you publish them
- You can review the invoice details before publishing
- To make the invoice visible and payable, see Publish Invoices
Understanding invoice statuses
| Status | Meaning |
|---|---|
| Draft | Created but not yet visible to residents |
| Open | Published and awaiting payment |
| Paid | Fully paid by the resident |
| Overdue | Past the due date with an unpaid balance |
| Void | Cancelled — no longer collectible |
Troubleshooting
I don't see the "Create Invoice" button
- Make sure payments are enabled for your property. Go to Settings > Payments to check.
- Verify you have the correct permissions for your role.
The unit I need is not in the dropdown
- The unit must exist in your property. Go to Units to add it first.
- The dropdown shows all units regardless of whether they have a resident assigned.
I entered the wrong amount or details
- If the invoice is still a Draft, you can void it and create a new one.
- If the invoice has been published but has no payments, you can still void it.
- Invoices with payments cannot be edited — void the invoice instead.
The resident didn't receive an email
- Check that the Send email notification checkbox was enabled.
- Emails are sent when the invoice is published, not when created as a draft.
- Verify the resident has a valid email address on their profile.