Managing Residents
Residents are the people connected to your property — owners, tenants, and occupants. Managing residents in Propty lets you track who lives where, control portal access, and communicate with your community.
- At least one unit added to your property (see Managing Units)
- Residents' names and email addresses
Resident Roles
Each resident has a role that describes their relationship to the unit:
| Role | Description | Portal Access | Voting Rights |
|---|---|---|---|
| Owner | Owns the unit | Yes | Yes (weighted by ownership share) |
| Tenant | Rents the unit | Yes | No |
| Occupant | Lives in the unit but isn't on the lease | Optional | No |
Tip: For units with multiple owners (e.g., a married couple), add each person separately and set their ownership share percentage. This is used for voting weight calculations in HOA elections.
Adding Residents
One at a time
Use the Add Resident button on the Residents page. You'll provide their name, email, unit, and role. You can also choose whether to send a portal invitation immediately.
For step-by-step instructions, see Add a Resident.
In bulk via CSV import
For large communities, click the Import button to upload a CSV file with columns: first_name, last_name, email, unit_number, resident_type.
Tip: When onboarding a new property, import residents in bulk first, then review and send portal invitations in batches.
Resident Statuses
Propty tracks each resident's portal access status:
| Status | Meaning |
|---|---|
| Pending | Added to Propty but not yet invited to the portal |
| Invited | Invitation email sent, waiting for them to accept |
| Active | Accepted the invitation, can log in to the portal |
| Inactive | Portal access temporarily disabled |
Sending portal invitations
When you add a resident, you can choose to send the invitation right away or wait. This is useful when you're setting up a property and want to get all the data entered before residents start receiving emails.
To send an invitation later, use the three-dot menu (...) on the resident's row and select Send Invitation.
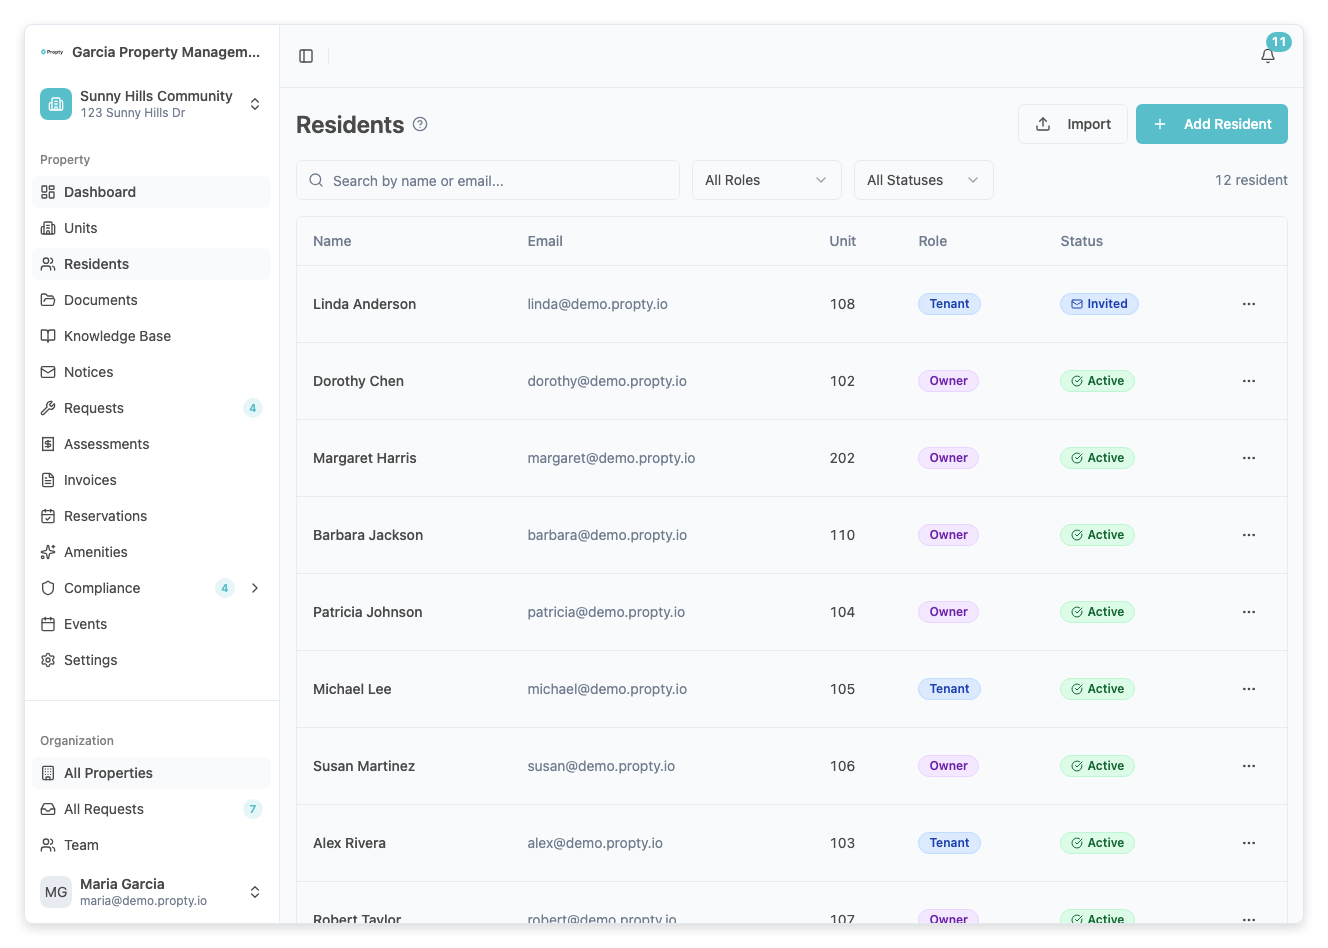
Managing Existing Residents
From the residents table, you can:
- Search by name or email using the search bar
- Filter by status (Active, Invited, Pending, Inactive) or role (Owner, Tenant, Occupant)
- Edit a resident's details from the three-dot menu — change their unit, role, contact info, or language preference
- Deactivate a resident to revoke their portal access without deleting their record
Language preference
Each resident can be set to English or French. All communications (emails, portal interface) are sent in the resident's preferred language. Set this in the resident's edit panel.
Best Practices for Admins
- Keep emails accurate — Email is the primary way residents access the portal and receive notifications. Verify addresses during import.
- Use the Pending status — Add all residents first, then send invitations in batches. This lets you review data before going live.
- Track occupancy — Filter by unit status to see vacancies at a glance. This helps with budgeting and communication planning.
- Update promptly — When a unit sells or a lease ends, update the resident's status to Inactive and add the new resident.
Troubleshooting
| Problem | Solution |
|---|---|
| "Email already exists" error | Each email must be unique within your organization. Check if this person was already added. |
| Resident not receiving invitation | Verify the email address, check spam, and try resending from the three-dot menu. |
| Need to move a resident to a different unit | Edit the resident and select a different unit from the dropdown. |
| Resident can't log in | Check their status — only Active residents can access the portal. Resend the invitation if needed. |